

In our journey through the digital age, it's invigorating to turn our attention to a time-honored craft like dovetail joinery, a technique that predates the internet by centuries.
We've navigated through countless sources and distilled the essence of what beginners need to know to master this art. From selecting the right tools to the final touches that make a joint not only functional but also aesthetically pleasing, we'll guide you through each step.
What's intriguing is how a seemingly simple interlocking of wood can provide such robustness and beauty. Stick with us to uncover the secrets behind perfecting this ancient craft, and perhaps, discover why it's still revered in the world of woodworking.
Key Takeaways
- Dovetail joinery enhances durability and aesthetics without the need for nails or screws.
- Selecting the right tools, such as a dovetail saw and chisels, is essential for success.
- Precision in marking, cutting, and fitting dovetails is crucial for a strong and seamless joint.
- Proper gluing, clamping, and finishing techniques ensure the joint's longevity and visual appeal.
Understanding Dovetail Joinery
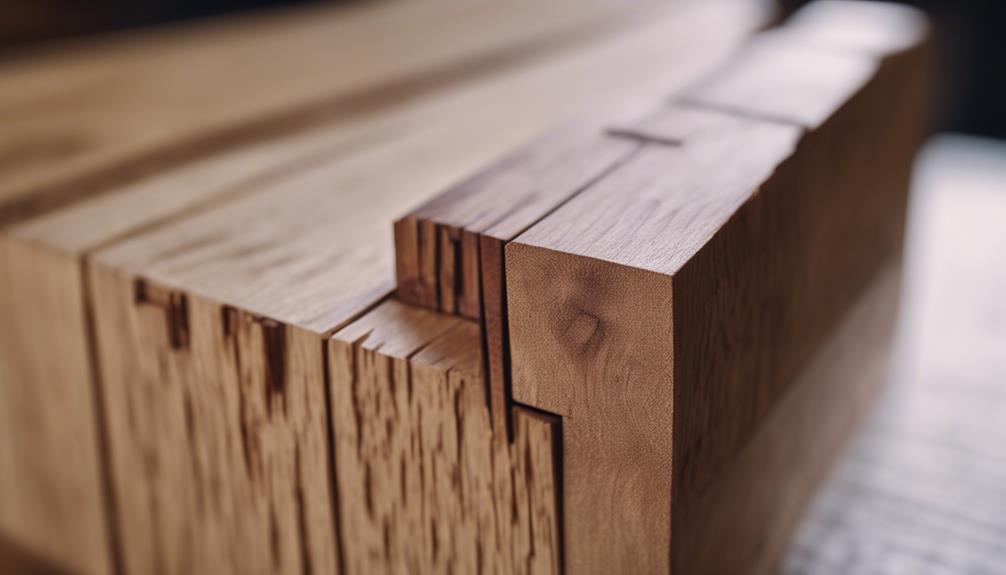
Dovetail joinery, a hallmark of craftsmanship and strength, involves precisely cut interlocking joints that guarantee durability and aesthetic appeal in woodworking projects. We've often marveled at how these intricate pieces fit together so seamlessly, creating a bond that's both strong and visually stunning. Traditionally used in the making of drawers, cabinets, and various types of boxes, dovetail joints excel in resisting forces applied perpendicularly to the joint, making them exceptionally sturdy.
We find that the beauty of dovetail joinery lies not just in its importance but also in its ability to elevate the look of a piece without the need for nails or screws. The interlocking design, with its pins and tails, becomes a tribute to a woodworker's skill. It's important for us to appreciate the balance between functionality and form that dovetail joints bring to a project.
Through our journey in woodworking, we've learned that mastering dovetail joinery opens up numerous possibilities. It's not merely about joining two pieces of wood; it's about creating a lasting legacy of craftsmanship that withstands the test of time. As we explore further into this technique, we're constantly reminded of the significance of precision and patience in achieving the perfect dovetail joint.
Necessary Tools and Materials
Before diving into the art of dovetail joinery, it's essential we gather the right tools and materials. This preparation guarantees we're not only ready but also set up for success from the start. Dovetail joinery, celebrated for its strength and beauty, requires precision. Achieving this precision is simpler when we're equipped with the appropriate tools. Here's what we'll need:
- A sharp dovetail saw: This specialized saw allows us to make the precise and clean cuts necessary for perfect dovetails.
- Quality chisels: A set of sharp chisels helps in removing waste wood and refining the fit of the joint.
- A marking gauge: Essential for accurate marking of dovetails, ensuring uniformity and precision in our work.
Having these tools at hand, we're not just ready to start; we're poised to excel. It's not about having a multitude of tools but the right ones that make the difference.
As we move forward, remember, the quality of our tools can greatly affect the outcome of our projects. Let's make sure we've what we need, keep them well-maintained, and they'll help us create beautiful, strong dovetail joints.
Designing Your Dovetail Joint
Now that we've gathered the essential tools, it's time to focus on crafting the actual design of our dovetail joint. Designing a dovetail joint involves choosing the type and dimensions to guarantee strength and aesthetics. We'll need to decide on the joint's size, angle, and the ratio of pins to tails.
| Feature | Consideration |
|---|---|
| Type | Half-blind or through |
| Angle | Typically 1:6 for softwood, 1:8 for hardwood |
| Size | Dependent on the thickness of the material |
| Ratio | Traditionally, one pin for every inch of width |
The type of dovetail joint sets the stage for the project's look and functionality. Half-blind dovetails are great for drawer fronts, where you don't want the joint visible from the front. Through dovetails are more common for box or frame construction, showcasing the joint's beauty.
The angle choice affects how tightly the joint fits together; softer woods need a gentler slope, while harder woods can handle a steeper angle.
Lastly, the size of the joint and the ratio of pins to tails must be proportionate to the material's thickness and the overall width. This balance ensures both the joint's strength and its visual appeal, preparing us for the next step: marking the dovetail layout.
Marking the Dovetail Layout
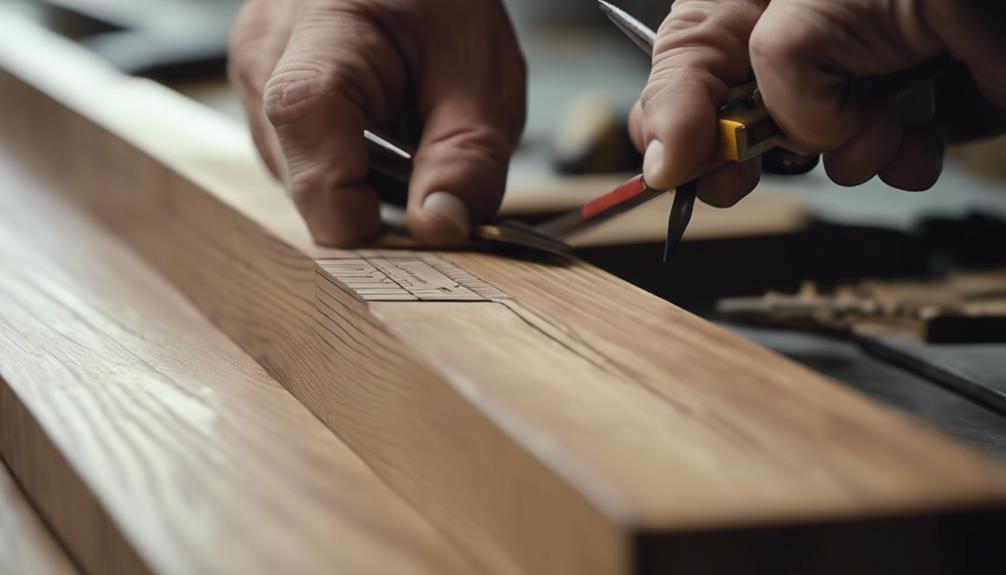
Having settled on the design aspects of our dovetail joint, it's time to accurately mark the layout on our wood pieces. This step is important because precise markings ensure that the pieces fit together perfectly. We'll guide you through the process, making it as straightforward as possible.
First, make sure you've got a sharp marking knife and a clear ruler. The sharper your knife, the more precise your lines will be, which is essential for tight-fitting joints.
Here are a few tips to keep you on track:
- Use a marking gauge to ensure consistent depth across all your marks. This tool is invaluable for maintaining uniformity.
- Mark lightly at first, then go over your lines to deepen them once you're sure of their accuracy. This approach allows for corrections if needed.
- Keep your ruler steady by holding it firmly against the wood. Any slipping can cause inaccuracies in your layout, leading to issues during assembly.
Cutting the Tails
After marking the dovetail layout, we'll move on to cutting the tails, making sure each cut is precise for a seamless fit.
We'll start by securely clamping the workpiece to our workbench. It's important that it doesn't move during cutting to avoid any inaccuracies. We've found that using a sharp, fine-toothed saw is key to making clean and straight cuts. A dovetail saw, specifically designed for this task, is our go-to tool.
When we begin cutting, we'll follow the lines we've marked as closely as possible. It's better to cut slightly outside the line than inside, as we can always trim down excess but can't add material back. We'll make sure to keep the saw perpendicular to the workpiece to guarantee the tails fit perfectly into the pins later on.
As we complete each cut, we'll remove the waste material between the tails. Chisels are perfect for this job. We'll start with a larger chisel to remove the bulk of the waste, then switch to a smaller one for fine-tuning and cleaning up the corners. The goal is to create a smooth, flat surface for the tails to sit flush against their corresponding pins.
Cutting the Pins
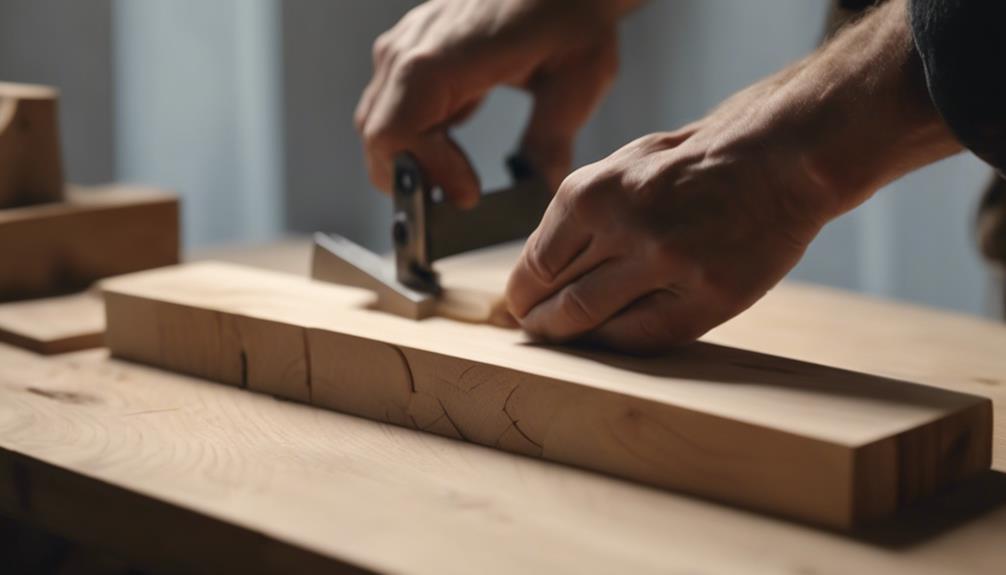
With the tails cut and prepped, it's time to turn our attention to precisely cutting the pins to guarantee a tight, seamless joint. We're moving into a phase where accuracy can't be overstated, as the fit between the pins and tails is what defines the strength and beauty of a dovetail joint. Let's explore how we can achieve this with a few key steps.
First, we'll secure the piece of wood for the pins in our vise, ensuring it's stable. We've found that a stable workpiece is essential for accurate cuts. Then, with our tails already cut, we'll use them as a template to mark out where our pins will go. This step is essential for ensuring that each pin will interlock perfectly with its corresponding tail.
- Marking the Pin Locations: Utilizing a sharp marking knife for clear, precise lines.
- Choosing the Right Saw: A fine dovetail saw is preferred for its control and precision.
- Making the Cut: Carefully follow your lines, keeping the saw perpendicular to the workpiece.
Perfecting the Fit
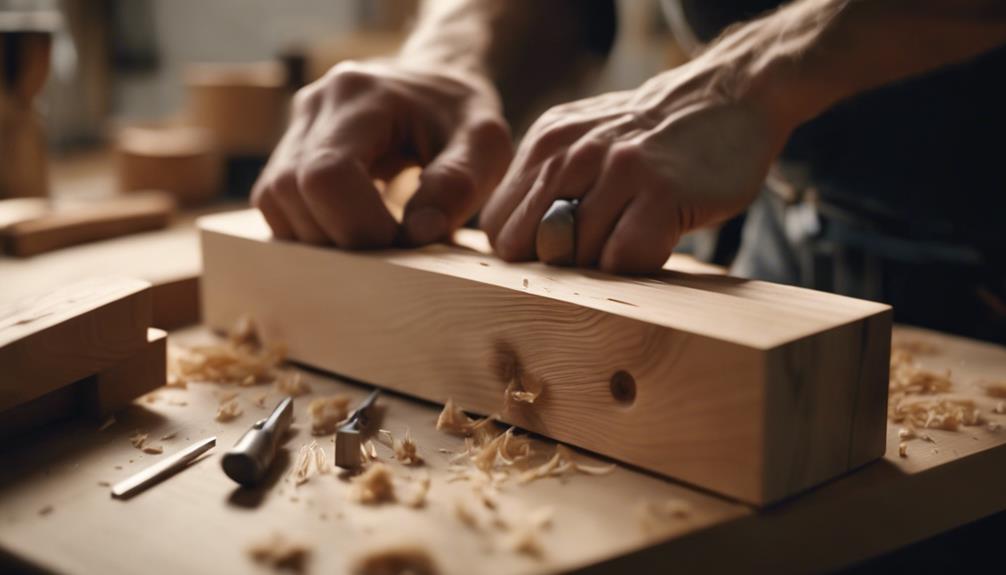
Now, let's focus on refining the fit between the pins and tails to guarantee our dovetail joint is both strong and aesthetically pleasing. Achieving this can feel like a delicate dance, but with the right techniques, we'll make sure a snug fit every time. One important step is to constantly test the fit as we go, making minor adjustments to avoid over-trimming.
Here's a quick guide to help us along:
| Step | Tip |
|---|---|
| Marking | Use a sharp pencil for precision. |
| Cutting | Aim just outside the lines. |
| Chiseling | Work from the corners inward. |
| Fitting | Test often; trim sparingly. |
| Final Check | Look for gaps and evenness. |
After carefully marking and cutting, we'll chisel away any excess wood, working our way from the corners to the center. This method helps prevent unwanted splitting or chipping. Testing the fit after each adjustment ensures we don't remove too much material. Finally, a thorough check for any gaps or unevenness will tell us we've achieved the perfect fit. Remember, patience is key; rushing can lead to mistakes that are hard to correct.
Gluing the Joint
Once we've confirmed a perfect fit, it's time to secure our dovetail joint with glue, a step that'll give it lasting strength. Choosing the right glue is essential; we typically recommend a wood glue that's strong, has a reasonable open time, and is compatible with the finish you plan to use. When applying the glue, we're careful to apply a thin, even layer. Too much glue can make the joint difficult to assemble and squeeze out can be a mess to clean up.
Here are a few tips to keep in mind:
- Apply glue with a small brush or a glue applicator to make sure you cover the tails and pins precisely without overdoing it. This precision helps prevent excess glue from squeezing out and making a mess.
- Focus on the inside edges of the cuts where the strength of the bond is most critical. Avoid applying glue to the outer edges to minimize squeeze-out.
- Consider using a glue with a longer open time if you're assembling a complex joint or multiple joints at once. This gives you more time to adjust the pieces for a perfect fit before the glue begins to set.
Clamping and Drying

After applying glue to our dovetail joint, we'll need to clamp the pieces together to guarantee a tight bond as it dries. We've found that using bar or pipe clamps provides the best pressure distribution across the joint. It's important to position the clamps strategically; too much pressure in one area can cause misalignment or even damage the wood.
We place a clamp every few inches, ensuring even pressure throughout the joint. While the glue sets, it's a good opportunity to clean up any excess with a damp cloth, preventing any hard-to-remove residue once it's dry.
Here's a quick reference table to help guide you through this process:
| Step | Tool Needed | Tip |
|---|---|---|
| Apply Glue | Wood Glue | Use sparingly to avoid excessive squeeze-out. |
| Position Clamps | Bar or Pipe Clamps | Distribute evenly across the joint. |
| Clean Up | Damp Cloth | Wipe away excess glue promptly. |
| Drying Time | Patience | Allow at least 24 hours for full strength. |
Finishing Touches
With our dovetail joint securely glued and clamped, it's time to focus on adding the finishing touches to enhance its appearance and durability. Now that we've tackled the technical parts, these final steps are about bringing out the beauty in our work and ensuring it lasts for years to come.
Here's what we'll do next:
- Sand the joint: We'll start by sanding the joint gently to remove any excess glue and to smooth out the surfaces. It's important to use fine-grit sandpaper and move in the direction of the wood grain to avoid scratches.
- Apply a finish: Choosing the right finish can make a world of difference. We prefer using a natural oil finish for its ease of application and the warm, rich tone it gives to the wood. Applying it with a soft cloth, we'll make sure to cover every nook and cranny.
- Buff to perfection: Once the finish has dried, we'll buff the surface with a clean, soft cloth. This not only enhances the shine but also provides an additional layer of protection.
Frequently Asked Questions
How Does the Choice of Wood Type Affect the Strength and Appearance of Dovetail Joints?
We've noticed the wood type greatly impacts dovetail joints' strength and appearance. Softer woods may not hold up as well, while harder woods offer durability and a sleek look, enhancing our projects' overall quality.
Can Dovetail Joinery Be Effectively Executed With Hand Tools Only, or Is Power Machinery a Necessity for Beginners?
We've wondered if we can solely use hand tools for dovetail joinery or if we absolutely need power tools, especially as beginners. It turns out, with patience and practice, hand tools can be quite effective.
What Are the Environmental Impacts of Using Certain Types of Adhesives for Dovetail Joints, and Are There Eco-Friendly Alternatives?
We're exploring the environmental impacts of adhesives in woodworking. Some adhesives harm the environment, but luckily, there are eco-friendly alternatives that don't compromise the strength of dovetail joints. We're keen on finding the best options.
How Does Dovetail Joinery Compare to Other Woodworking Joinery Techniques in Terms of Longevity and Durability of the Final Product?
We've found that dovetail joinery stands out for its durability and longevity compared to other methods. It's a validation of craftsmanship, ensuring pieces last generations without needing the frequent repairs other techniques might require.
Are There Any Historical or Cultural Significances Associated With the Dovetail Joinery Technique Across Different Regions or Time Periods?
We're exploring the historical and cultural significance of dovetail joinery. It's fascinating how this technique has been appreciated across various regions and time periods for its beauty and strength in woodworking projects.


